How to Grow Madder From Seed
Home »
26.03.2024

This year I am growing dye plants for the first time. I have fallen in love with making hand dyed, machine pieced, hand quilted quilts with natural fibres and natural dyes. My first natural dye quilt was made with cotton calico and I created colours for it with plants I foraged around the city, including in my favourite woods. You can read more about that quilt here.

This year I am growing several different plants on my allotment with the goal of being able to make my own dyes. I am trying madder, weld, and woad, as well as indigo (indigofera tinctoria), safflower, coreopsis, marigolds, calendula, sulphur cosmos, and black hollyhocks. I’ll share how I get on with each of these as the season progresses.
Today though, I wanted to share my experience of growing madder from seed. I have read that madder is quite difficult to germinate, but I have had good germination and found it to be quite straightforward so I thought I’d share my method in case it’s of help to other dyers. What I love about the quilting and natural dye community is that, like many heritage crafts, the skills and practices are a form of folk knowledge, freely shared amongst the very friendly community. In the modern age that takes the form of each of us sharing our experiments via social media or blogs. So here’s my little contribution, I hope it’s of help.
I bought my madder seeds last autumn from The Outside Dyers via Etsy. They have a website too. They are based in Berkshire in England. The seeds were lovely and fresh – still slightly sticky to the touch – when they arrived. I really recommend them as a seller if you are based in the UK.
I live in a flat and don’t have much space for starting seeds indoors, so I have improvised a method that allows me to keep things organised whilst making the most of the light and heat resources I have available.
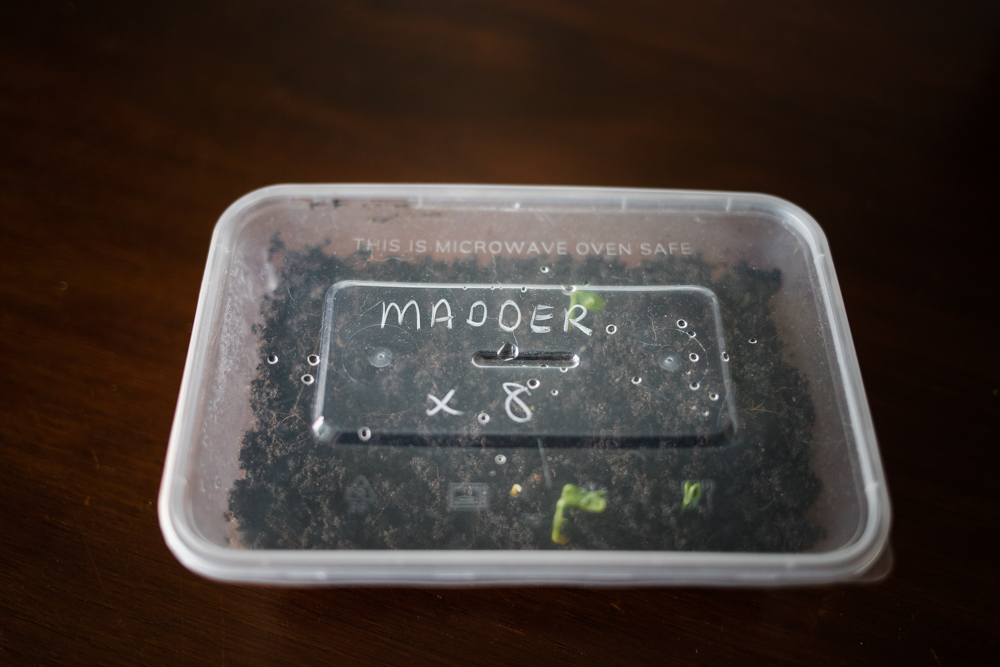
To germinate the madder seeds, I filled a plastic takeaway tub with gritty seed starting compost – John Innes from my local garden centre – and sprayed the surface with water. This was to make sure the compost was damp but not compacted. Then I pushed each seed into the compost with a chopstick, making sure they had good contact with the potting compost and that they were buried, but only by about 5mm (1/4 inch). I gave the compost another good spray, firmly clipped the lid in place, and put the takeaway container on top of my hot water storage tank for warmth.
My hot water storage tank is in a windowless cupboard in the interior of my flat and holds water which comes from our building’s communal boiler. I haven’t measured it precisely, but the top of the tank feels comfortably warm to the touch and I would estimate that it’s about 25C (75F) up there. I stow all sorts of seeds on top of the tank in sealed containers, checking on them daily so that as soon as seeds germinate I can bring them into the light. I started my chillies, aubergines and tomatoes up there too as it speeds germination and maintains a steady temperature day and night. Many seeds only need light after germination, so it makes sense to use this warm dark space to free up space by the windows and on my heat mat for seedlings that really need it.
The secret to germinating madder is patience. It takes time, or at least it does in late winter in the UK. It took about three weeks before I started seeing signs of life from my madder seeds, but lots of them have come through. As soon as they germinate I bring them into the light as they no longer need the heat. It might take you more or less time than me, depending on how warm your home is and the time of year you are trying to start your madder seeds. What I will say though, is don’t give up on them. That’s the beauty of a sealed takeaway tub – you don’t need to worry about whether the soil is too wet or too dry like you would with a seed tray that’s open to the elements. You really can just leave them be until they germinate.
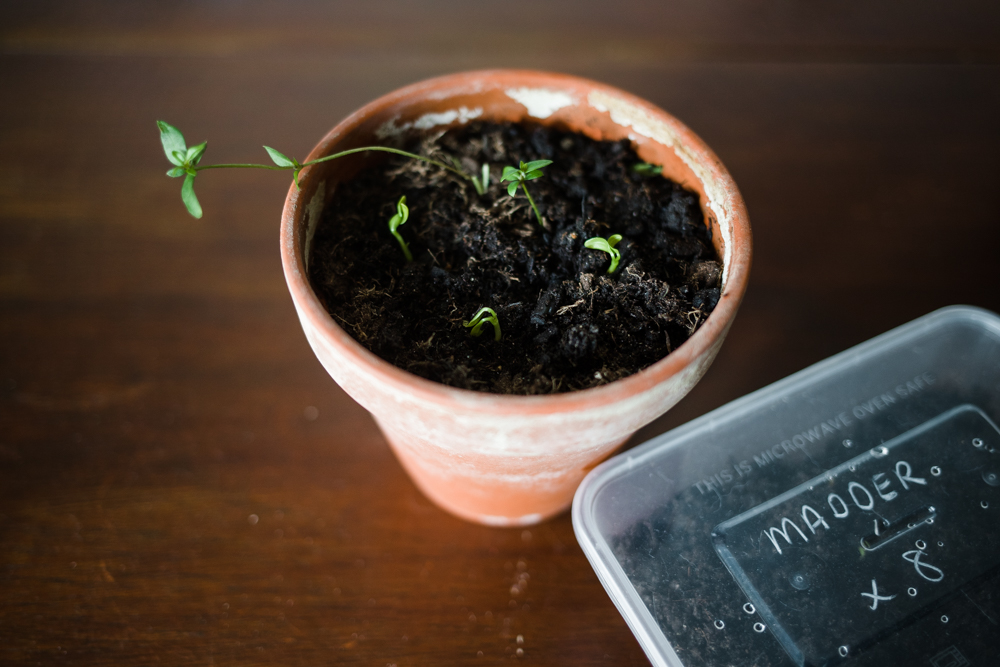
I started a few seeds in January because I was impatient and wanted to get the season started – that’s the long seedling pictured in the photo directly above – but I sowed 8 more at the start of March, which are the little seedlings you can see in the top picture with their long orange tails. I have pricked out the seedlings and potted them all up together, and they are now outdoors on my sheltered north-west facing balcony. I will transfer them to the allotment in a month or so once the soil has warmed and the frosts are behind us, and will update this post with new photos as the growing season progresses.
Not all of my madder seeds germinated at once, so I pricked out those that had germinated and closed the lid on the remaining seeds, to allow them to come through in their own time.
Update 27th May 2024

From an early March sowing, my madder was ready to transplant in late May. Here is a photo of the root system. I have now planted my madder into a permanent position on my allotment, near but not immediately adjacent to my asparagus and oca plants which are also perennial. Madder does creep, but I’ll just keep an eye on it and make sure that shoots don’t pop up too far from where I want them. The oca gets dug up each December, but this spring I discovered a few tubers that I had missed had survived our very mild but wet winter without mulch, and had started to sprout. The oca is between the madder and asparagus, so madder shoots would appear in amongst the oca before they get anywhere near the asparagus.

Leave a Reply