How to make your photos look like medium format
Home »
09.08.2018

Back in 2016 I wrote a post all about how to make your digital photos look like they were taken on film. Today I thought I would share another technique post on the subject of the film look, this time focusing on achieving the medium format look with a Four Thirds, APSC or Full Frame digital camera. This is a method I often find myself using, as I prefer the way longer lenses render photographic images. I sometimes use a 35mm or 28mm lens when I need to get a group shot or wide angle perspective when I’m working, but for my personal work I prefer to use the following method to retain the depth and feel of longer lenses in my wider perspective images. This technique is also really helpful when shooting in a tight space as it allows me to capture more of the scene without needing to reach for a wider lens to fit everything in.
How to make your photos look like medium format
The method I use to make my photos looks like they were taken with a medium format camera is nothing new, and I don’t claim to be the first to try it, however I have modified the method in a way that I think makes it much more accessible. More on that below.
I first came across this technique as used by wedding photographer Ryan Brenizer. It is often called the ‘Brenizer Method‘, but it can also be called the ‘Bokeh Panorama Method’. In short, it is the use of a long lens on a crop or full frame digital camera to produce stitched panorama images with a shallow depth of field. You shoot multiple frames, each with a small bit of overlap with the last so that special software can blend them together in post-production.
You’ll find lots of examples with very, very shallow depth of field, but it’s not a requirement. You don’t have to shoot at F1.2, F1.4 or F1.8 to use this method. I often shoot at F4 or F5.6 and use the method more for how it allows me to open up a composition without it becoming too flat. This method can also be used to make photos taken with an APSC or Micro Four Thirds camera look like they were taken on 35mm or ‘full frame’. There are no hard and fast rules, so just get out with your camera and get creative.
The tools you need to ‘fake’ the medium format look
A digital camera which uses interchangeable lenses
It doesn’t have to be full frame (35mm equivalent). You can make bokeh panorama pictures with a cropped sensor too, either APSC or Micro Four Thirds. You do need to use a camera that allows you to change the lens though. This technique won’t work on a phone camera or a little point and shoot because phone and PAS sensors are often very small and as a result introduce too much distortion to the frame which becomes very pronounced when you stitch the individual frames together.
A lens with a focal length of 50mm or longer
50mm absolute, not equivalent focal length. 50mm lenses are very cheap to pick up. You can either buy a modern 50mm lens or find a legacy lens made for a film era camera and use it with an adapter. The benefit of legacy lenses is that they come with proper manual focus rings, and they are full of character. The reason you need to shoot 50mm or longer is again due to distortion. The wider your lens, the more barrel distortion appears across the frame. Distortion in each ‘puzzle piece’ of your final image makes it very hard for the software to accurately stitch the frames together.
You can also use a free programme called AutoStitch. It’s what I used when I first started and before Lightroom introduced a Panorama feature. Lightroom does make your life easier, but it’s by no means the only option for stitching software. There may well be some good options to experiment with on Android and iOS too if you fancy having a look.
How to make medium format pictures with a regular digital camera
Ryan Brenizer’s method often makes use of 10 or more individual frames, but my modification of the Bokeh Panorama / Ryan Brenizer Method is to take just 2 or 3 frames for stitching, and rarely more than 6. In my day to day photography I will often take a 2 or 3 frame panorama, left to right vertically (portrait orientation), or bottom to top horizontally (landscape orientation). For larger images I might take a row of 3 LTR (left-to-right) on the top, followed immediately by a row of 3 RTL on the bottom.
The following images show an example of a 2 frame panorama image I made of a blue van I came across in a village just outside Oxford. I had a 55mm manual focus lens on my Canon 5D2, and was shooting at around F4 or F5.6. I took two vertical frames as I wanted to capture the van and the whole of the barn while maintaining the soft feel of the overall image. If I’d reached for a wider lens, the resulting image would have lacked the compression of the longer lens and would feel somewhat flat. I also couldn’t step back any further, as there wasn’t any space to do so. That’s the beauty of larger formats, be they 35mm over APSC or medium format over 35mm! Compression and depth are maintained at wider perspectives, and wider perspectives are possible despite space constraints.


There is a great deal written about the Brenizer Method and Bokeh Panorama Method elsewhere, but here are a few tips on the technique that I hope will help you to find your feet when you go out shooting for the first time.
Keep it simple
Choose a simple subject for your first attempt, and limit yourself to just 2 or 3 frames. A good first subject would be a still life scene, a landscape, or a portrait of a friend or family member who is happy to stand or sit still for you for a little while. Learn to walk before you try running. I often see photographers try 30 frame panoramas out of excitement, but never really use the technique in their day to day shooting as it feels too overwhelming and complicated when shooting that many frames!
Lock down your exposure and focus settings
Once you have found the correct exposure for your shot, lock down your settings. Either shoot in full manual mode, or use the exposure lock function on your camera if you’re shooting in an automatic mode of some variety. You don’t want your exposure changing between frames! Likewise, either use a manual focus lens, switch your lens to manual focus, or use the focus lock button on your camera if there is an option for that. You don’t want your focus to change between shots!
How to shoot it
The secret behind a successful bokeh panorama image is to move your camera just a little bit between each frame, and to make sure that you have a little bit of overlap between frames so that the software will have a point of reference from which to stitch your final image. I find that I am most successful when I shoot LTR or RTL rather than CLR (centre-left-right) or CRL. This is because I only have to move my camera a small amount between frames, which makes me more accurate.
One last tip: Move your body, not your camera. When shooting a bokeh panorama or Brenizer Method image, move from your hips, keeping the camera steady in your hands, rather than keeping your body still and moving the camera using your wrists and hands. If you move from your wrists you will change the plane of focus and may end up with unwanted distortion or artefacts in your finished image.
How to edit a bokeh panorama in Adobe Lightroom
Before you can edit your final image, you need to complete the merge in Lightroom. It’s best to merge the photos before editing them for colour, exposure, etc. Completing your edit this way around will give you the most accurate and pleasing results.
 Open up Lightroom and select your unedited images
 Right click on one of the images in your set, and navigate to ‘Photo Merge’ and then ‘Panorama’
 Review your preview, and then select ‘Merge’
Once you have merged your photo, Lightroom will create a new DNG file for you to edit. You can edit this image the way you would normally edit your RAW files. Make sure to get rid of any white space that is generated around your stitched image, and choose an aspect ratio for your crop that reflects the film you are trying to match (e.g. 1×1 for Pentacon Six, 3×2 for Pentax 645, 4×5 for Pentax 6×7).
Take some time to look for distortion in your finished image. You can use Lightroom’s distortion and perspective correction tools to correct any lines that look wrong to your eye, and to correct for any barrel distortion that may appear depending on how close to your subject you were standing. As a rule of thumb, the closer you are to your photographic subject when creating a set of images to stitch together as a panorama, the more likely you are to encounter distortion.
I like my lines straight, so I always use the perspective tools to make horizons level and to make sure that walls are vertical. You may not be as obsessive about the little details as me, and that’s okay too!
I love using this technique when I’m travelling as it helps me to create images that feel a little bit closer to my dreams than reality. It’s also one of my favourite tactics when shooting in a busy place. I don’t like taking standard tourist snaps with lots of other people in them, so I shoot long and selectively include the pieces of the scene that reflect the mood I’m trying to capture, rather than every bollard, tourist and billboard in view! Of course this technique doesn’t work in every situation. It won’t work when the light is changing fast, or if your subject is moving fast (sports photography, pet photography, when taking pictures of young children) but for still life, landscapes and environmental portraits, it’s a lot of fun.
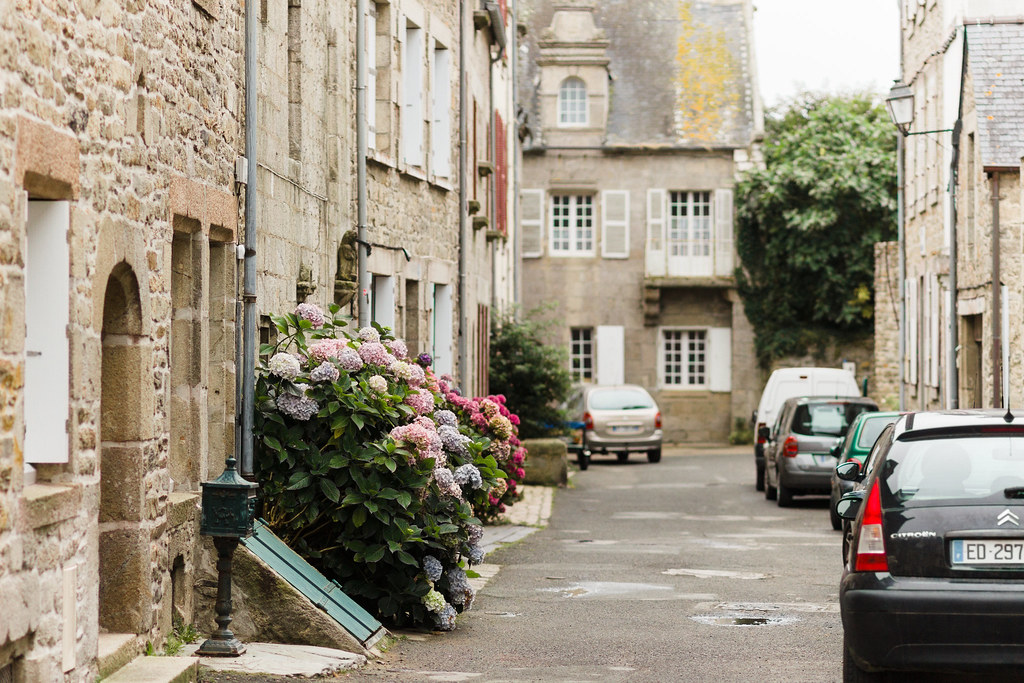
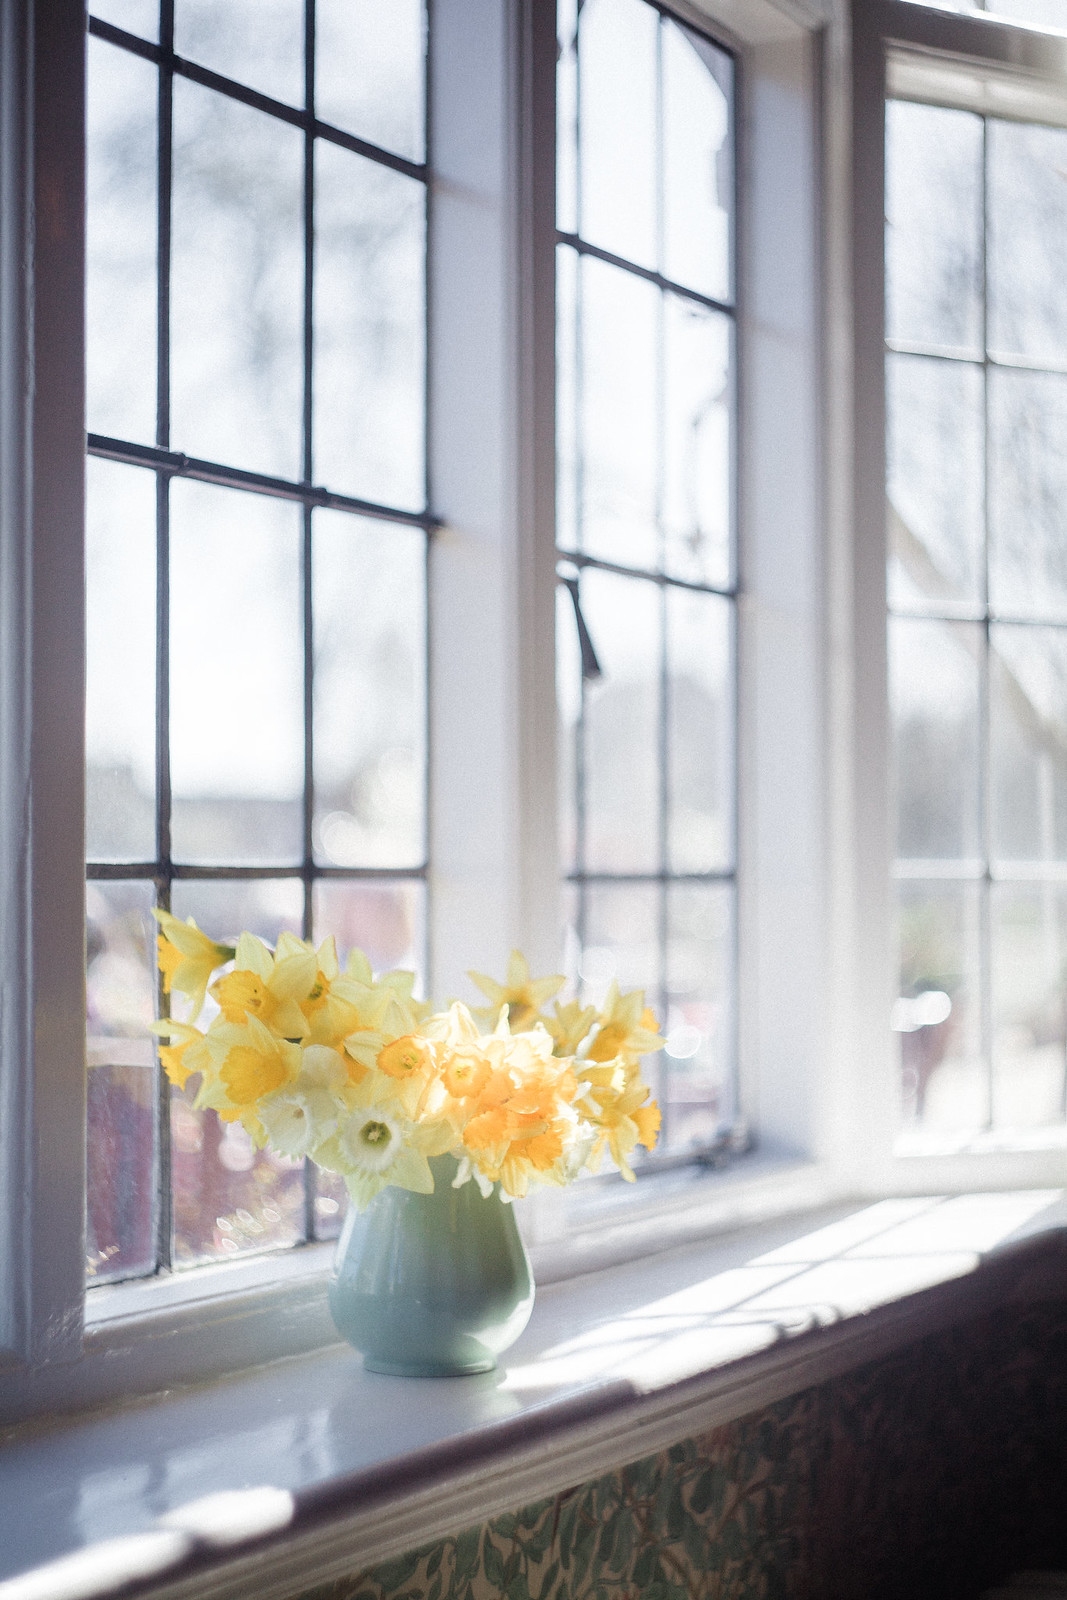
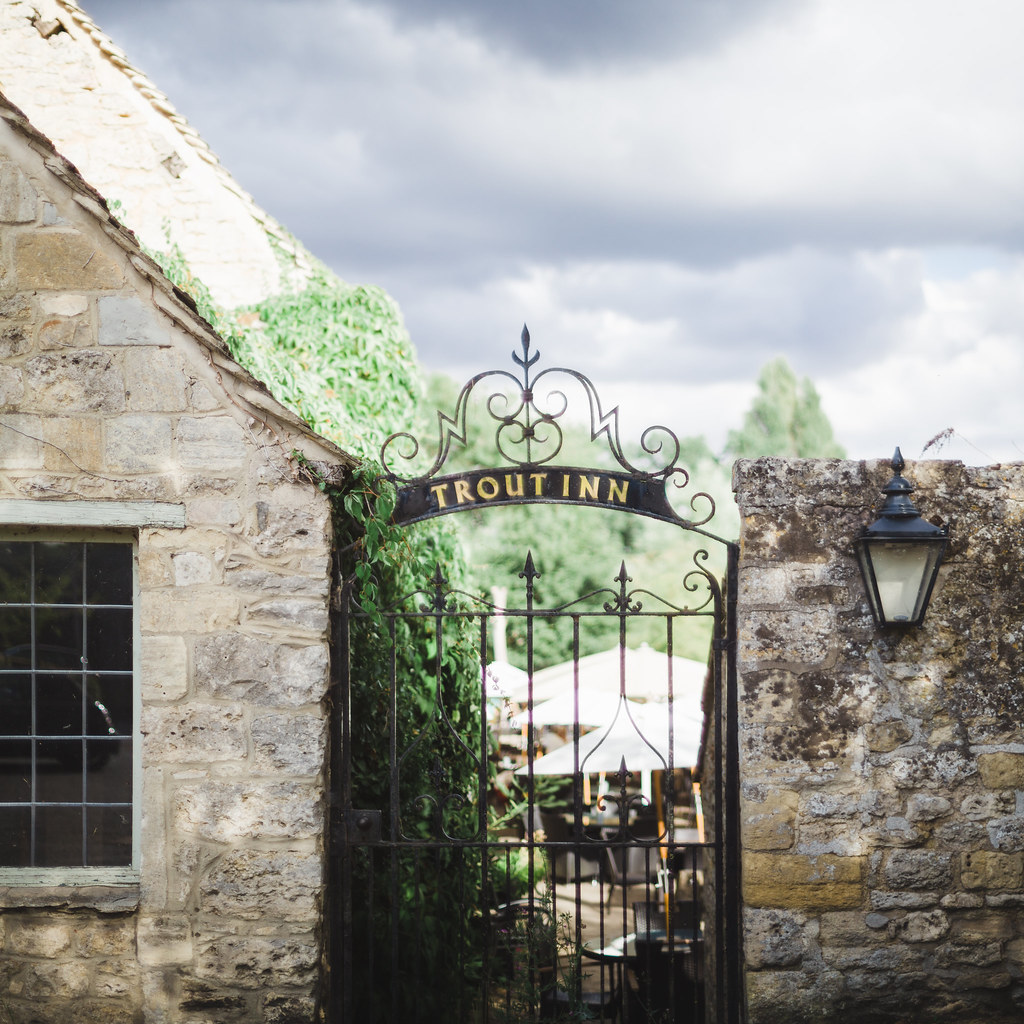
Here are a few more examples of photos where I’ve used this technique.